Home › Forums › Creative Content › Second Head
- This topic has 21 replies, 4 voices, and was last updated 16 years, 12 months ago by
Anonymous.
-
AuthorPosts
-
-
28/03/2007 at 6:30 pm #5933
Anonymous
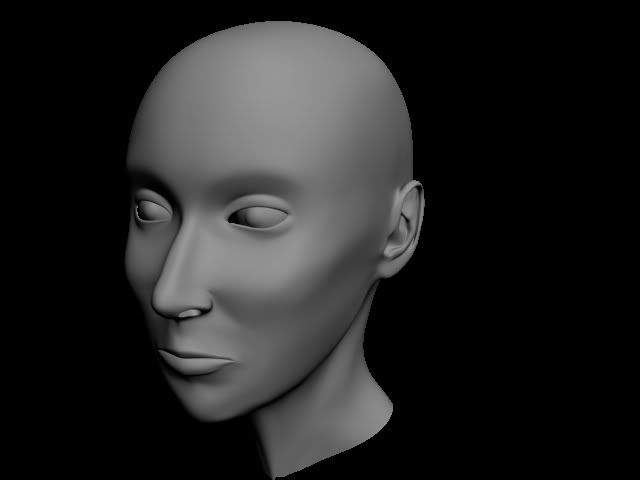
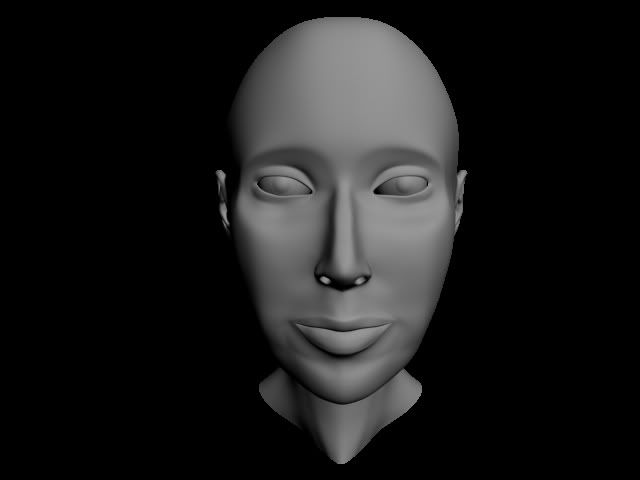
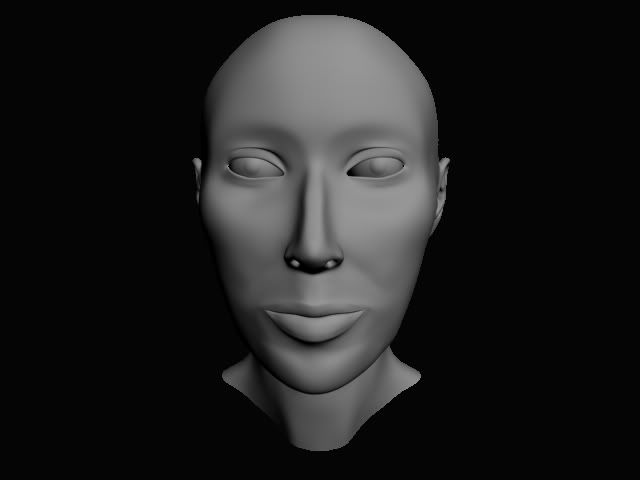
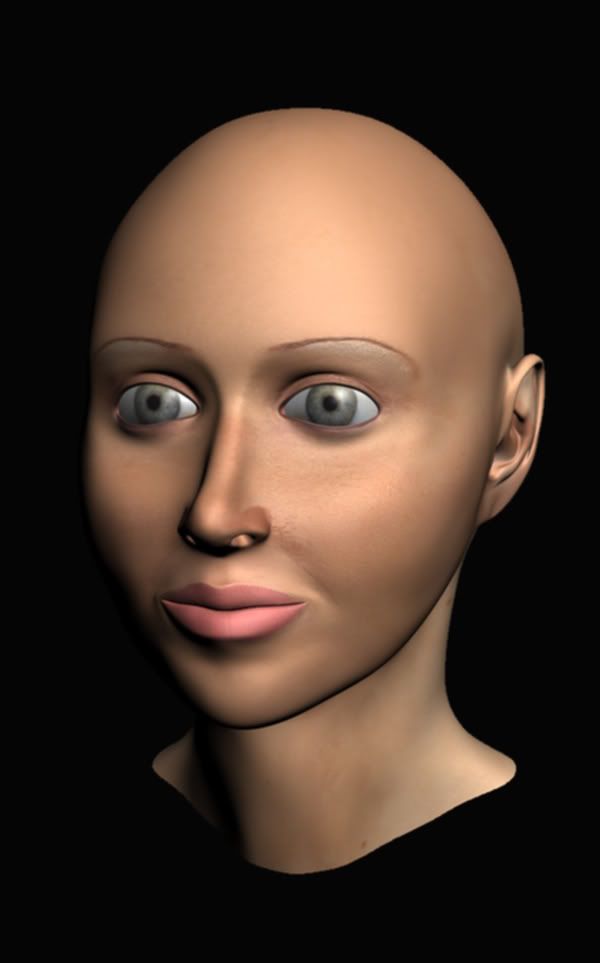
InactiveOkay, This is the second human head I have made, I know its not great but I am open to suggestions for improvements.
Perspective
 Front
Front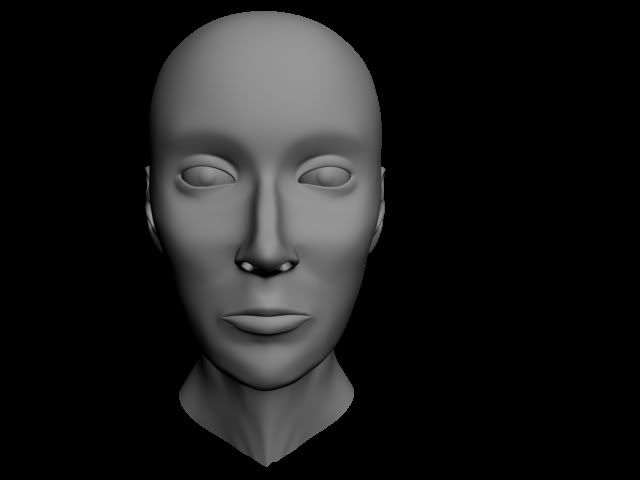 Side
Side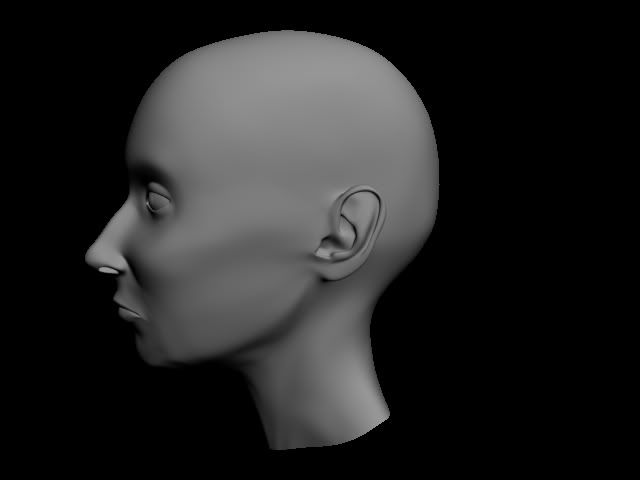 Back
Back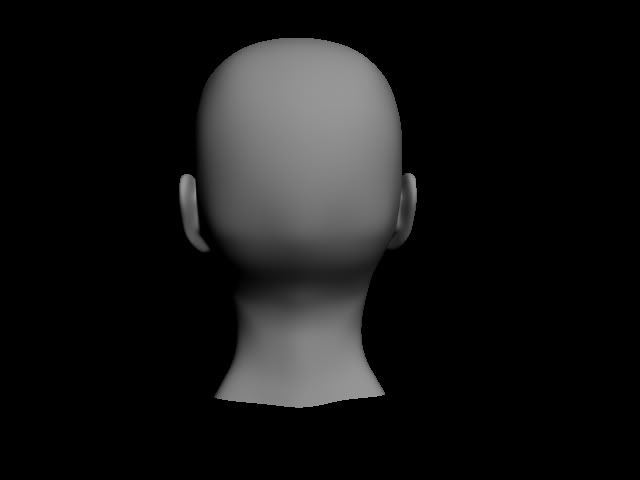 Bottom
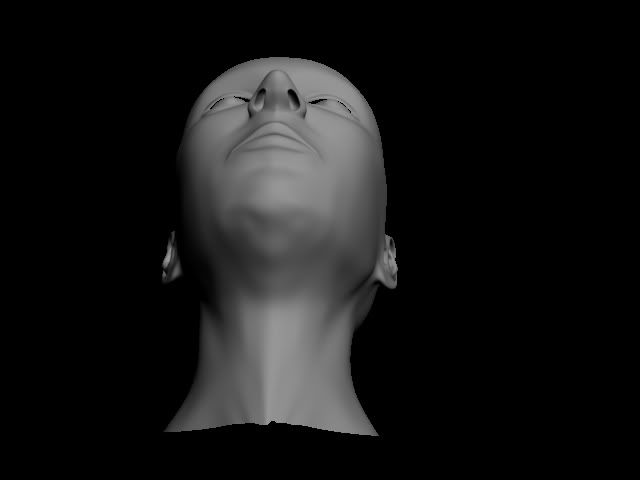
-
28/03/2007 at 10:16 pm #36261Inactive
Suggestion: take it into ZBrush or Mudbox (eval versions available), subdivide and add more detail. You can then bake the extra jizz into a displacement or normal map for rendering
-
29/03/2007 at 9:26 am #36268Inactive
Thanks for the suggestion but I am only just learning Z-Brush, so it will be a while before I implement it. And I have never textured a human before so I am just trying to get the character model to a good place and then start texturing. Maybe at a later date I will play with the head in Z-Brush but for now I want to get the basics.
-
29/03/2007 at 4:21 pm #36277Inactive
Well you’ve made a good start anyway, you should try Mudbox, you’ll be sculpting within an hour. Theres a trial version here:
-
29/03/2007 at 4:28 pm #36279Inactive
Okay, thanks for the link, I will download it and give it a try but I won’t use it in this project, thanks again.
-
29/03/2007 at 5:11 pm #36281Inactive
Very Nice!. If you want to get all CSI on it there is some good reference material here
http://www.dipaola.org/stanford/facial/class5notes.html
Some movies of facial muscles working too if you ever plan to animate it.I did a quick photoshop overlay of a female skull and your model looks pretty good. I would change front crown to leave some room for scalp thickness. Maybe a little too projected in middle of the face and just slightly under protruded in the chin. Bit too much space at back of head.

-
29/03/2007 at 5:56 pm #36282Inactive
Wow, like the overlay, where did you get it? Question though, is that just an average size of the female head or are most female heads the same as that, I presume there is big differences between each skull ya? Don’t know everything yet?
What do you mean by front crown though? As in the frontal bone, or the parietal bone or the occipital bone? When you say too projected in the middle of the face, you talking the nose or the middle in the side view, so where the zygomatic arch or the cheek bone from the eye to the ear is? Thanks for the comments, keep em up.
-
29/03/2007 at 6:48 pm #36284Inactive
Skulls do differ in shape and size but you can generalize into European, Asian etc. as a starting point. The male and female skulls are quite different in every case.
By front crown I meant the top of the head were blue overlay is touching the edge of the head – needs to have a small gap. Thought cheeks could come back a bit.
If it helps I quickly photoshoped what making those changes would look like.

-
29/03/2007 at 11:54 pm #36292Inactive
Thanks alot man, you have been a great help so far. Will implement those changes, I agree that the head needs to come up and the cheeks in your photoshoped model are much more defined. It is great to get this kind of feedback. Working away on the model at the moment, won’t be ready until tomorrow, if only making edits in 3D was as fast as photoshop.
-
30/03/2007 at 7:54 am #36296Inactive
That link is really good…nice to see the differences between a male and female skull so clearly shown
-
30/03/2007 at 12:43 pm #36302Inactive
Here is an update on that head.
Front
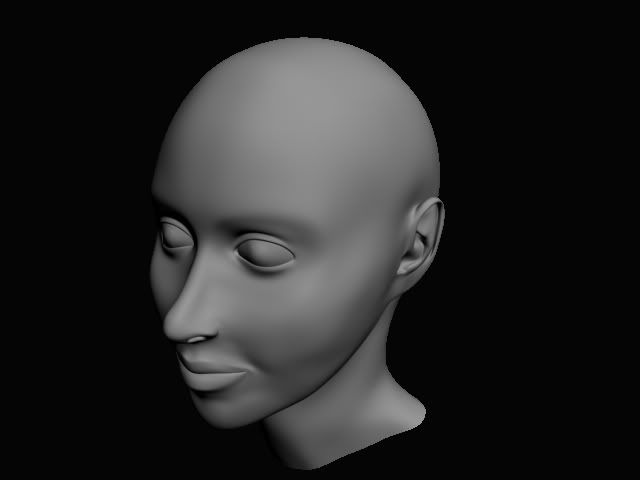
 Perspective
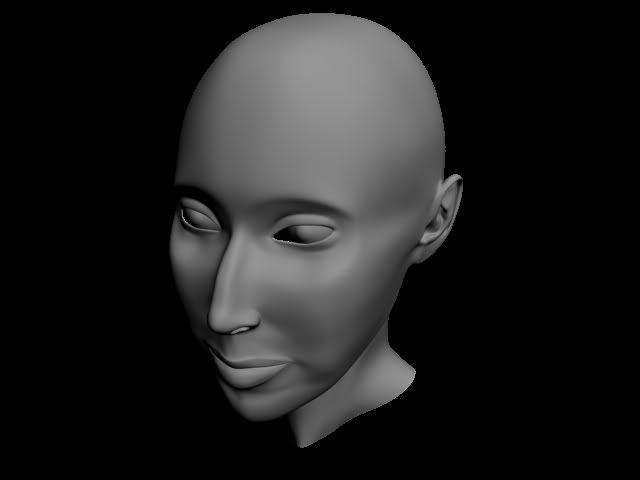 Side
Side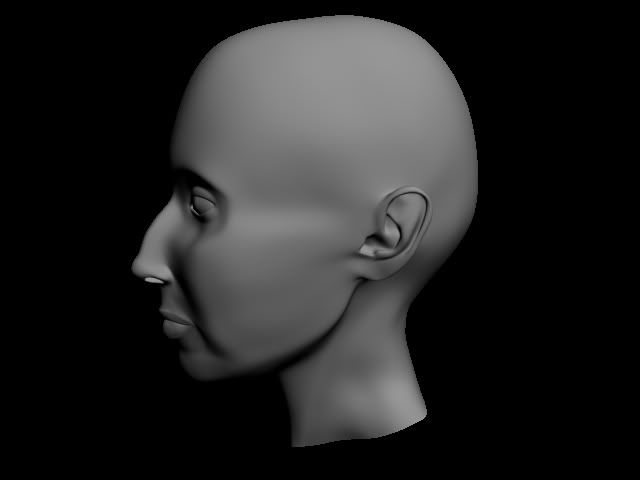 Back
Back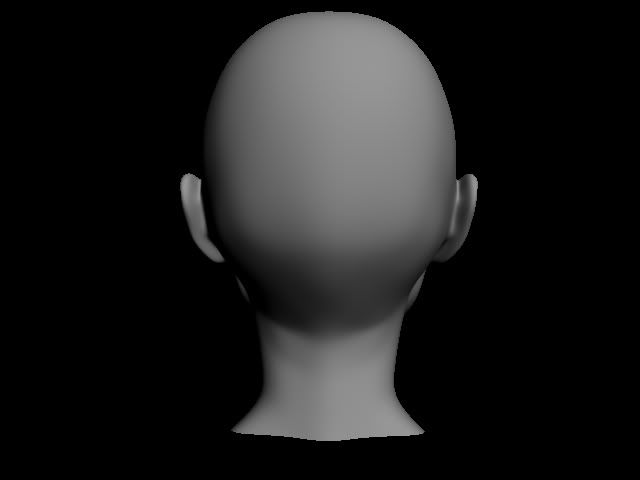
-
30/03/2007 at 2:53 pm #36306Inactive
Again very impressed. Your side profile has very good proportions. I did an overlay of some internet beauty (below) and it matches up nicely. If you are modeling this on someone in particular or are using some photos of a random girl you should post them for comparison. (Photos of random girls would brighten up this site immensely :wink:
Photos always help to check proportions are natural even if your model is a composite.Perhaps straighten bump in nose. In the front view I would open the eyes more at the nose side. Widen whole face but leave eyes where they are and widen jaw but leave lips where they are too. Again made Photoshop changes to show you what I mean. Hope this helps.

-
30/03/2007 at 4:21 pm #36310Inactive
Again made some edits, especially to the neck, it wasn’t looking very femine. Made a few other edits, take a look
-
02/04/2007 at 5:59 pm #36345Inactive
After the advise I got, I decided to pull the model back to a European model kind of went a bit crazy and ended up with something Asian.
-
11/04/2007 at 9:30 pm #36430Inactive
Alright, I tried first to unwrap it but thanks to a large amount of poly’s, perhaps a bit stupid to try to use a high poly model as my first unwrapping experience, when I tried to use the pelt mapping option on parts of the face it would only unwrap to a certain level and then crash because it ran out of memory. So I decided to use another method.
I watched a tutorial dvd about camera projection mapping in maya, where you set up a camera, then use that camera to render an image and then you take that into photoshop make an image ontop of that rendered image. Once this is done you bring it back into maya and set up a material to project that image on the geometry through the camera and then you bake it out. But I am using 3ds max 9 and I thought I could use the camera map per pixel material and then render to texture but I was wrong, it turned out a bit off and you can only see it properly when you render out the camera view, you can see it in the viewport but it is distorted and repeats and when I bake it, what is in the viewport shows up.
So can someone point me in the direction of a good high poly unwrap tutorial, or tell me how to fix my memory issues in 3ds max, as I have 3 gigs on my machine DDR1 though, or tell me how I can camera project my material like you can do in maya. This unwrapping and texture business is as long of a road as everything else in 3d, any and all help would be appreciated.
-
11/04/2007 at 9:44 pm #36431Inactive
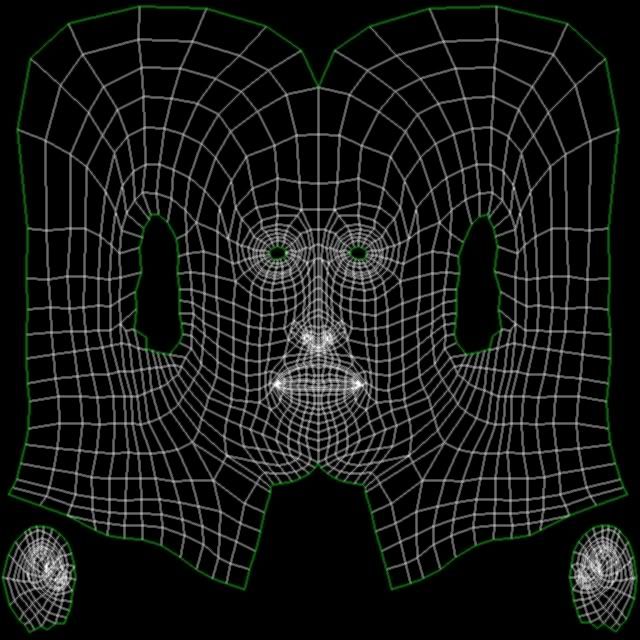
The head is symmetrical right? Delete half the model along the axis of symmmetry, this will instantly half the amount of polys you’re working with. Play about with default cylindrical and spherical UVW mapping (pay particular attention to where you place the green "seam" on the gizmo – it can make or break your unwrap). When you are reasonably happy, then go into the UVW Unwrap editor and relax UV clusters so that no polys are overlapping. When you have a UV layout you feel you can worth in Photoshop/similar, mirror the half head model, attach the new mirrored model to the original and flip the UV coordinates horizontally, then you can weld the line of symmetry in the UVs in the UVW unwrap editor and paint away.
You should end up with something like this, but try and keep the seams vertical on the extreme right and left sides:

-
12/04/2007 at 2:38 pm #36444Inactive
First I would to thank both david and pete for the great help they have been. So onto the questions, do you think it is better to do a whole face unwrap like using the spherical or cylindrical methods or breaking pieces off and doing them individually and then reattaching them? should I use pelt mapping instead of the normal mapping techniques? How do you flip the UVs? Do you know how to select a row of verts, rather than select them one at a time, like edge loop or some such? You say keep the seams vertical in the extreme right and left do these have to be straight? I can see by that uv map that there would be some distortion in areas like the mouth, ears and eyes? I thought the aim was to try and get everything straight and in lines and make the checker pattern even throughout? And lastly I tried cylindrical mapping but the UVs at the top always came out distorted, even when I detached them and then reattached them. Oh, one more thing, any hints on how to increase workflow in the uvw unwrap editor as in speed it up because it is a long process with a high poly model?
-
12/04/2007 at 4:38 pm #36445Inactive
Hi subedei. Pete would be better placed to give you those answers as I’ve been working low poly for too long but I will give it a go.
Very Good Max Video tutorial: link
Watch Part 09 – Unwrapping UVs for Organic Models movie two.Breaking Pieces off – I would try and avoid it as you may create seams. Maybe just the ears if you are concerned about them.
Mapping- Not used pelt mapping in max to un-wrap uvs myself but hear it is a good tool. Would be useful for the ears if your separating them. Give it a try and just texture with a checker map to see any problems.
How do you flip the UVs – I’m a blender man so I may be thinking about this wrong but if as pete suggested your head is symmetrical, can you not just cut the head down the middle discard half, texture it, duplicate the mesh and mirror it or use symmetry modifier, your Uv’s should mirror too. So seam the two meshes and then your Uv map is all setup if you want to add asymmetrical detail to the texture? Any way glanced at tutorial above and it covers this correctly.
Select verts Max edit UVW’s has a vertex button – then you just marquee what you want as far as I know.
Straight even lines – Can’t really be done for organic shapes to my mind. Just distort your texture accordingly.
Cylindrical mapping – Yep distortion at top and bottom of head will happen with this method – just the way the projection works. Someone needs to come up with pill shaped mapping!
Speed up unwapping – Are you unwrapping half? -
12/04/2007 at 6:35 pm #36446Inactive
Thanks alot dave, will take a look at that tutorial. Ya, cutting the head in half should speed things up but I was just looking for tips on using unwraps modifier edit menu, I thought their might be some tools that I am not using that could speed up my worflow. Ill be back to throw up my UV map with any luck later on today or tomorrow.
-
12/04/2007 at 11:05 pm #36448Inactive
First I would to thank both david and pete for the great help they have been.[/quote:06b305e282]
No problem mate, thats what the Content boards are forSo onto the questions, do you think it is better to do a whole face unwrap like using the spherical or cylindrical methods or breaking pieces off and doing them individually and then reattaching them? should I use pelt mapping instead of the normal mapping techniques? [/quote:06b305e282]
I always use the break apart and re-attach method, resulting seams can be welded back together in the UVW Unwrap editor later. I don’t bother with pelt-mapping, especially with heads. My advice is find an approach that works for you (Jaysus I sound like Dr. Phil!) and develop that technique to work for organic or inorganic models.
How do you flip the UVs?[/quote:06b305e282]
In the Unwrap UVW editor there is an option to "flip horizontal" or "mirror horizontal" in the Tools menu.Do you know how to select a row of verts, rather than select them one at a time, like edge loop or some such?[/quote:06b305e282]
What David said. One tool you NEED in your unwrapping arsenal is UnwrapTools by Steve Johnson, you should find it on http://www.scriptspot.com. It really helps with alignment of UVsYou say keep the seams vertical in the extreme right and left do these have to be straight?[/quote:06b305e282]
For best results, if the line of symmetry in your model is a vertical row of edges, try and keep them straight in your UV unwrap.I thought the aim was to try and get everything straight and in lines and make the checker pattern even throughout[/quote:06b305e282]
Its important that the checkers be distributed evenly over your model, to reduce stretching and distortion when painting a texture in Photoshop. This is less important if you plan on using Render To Texture to bake out textures or lighting info into a map.Good luck, unwrapping can be tricky to get yer head around but once you nail it you’ll never look back
-
13/04/2007 at 4:17 pm #36455Inactive
Okay here is the normal map and the unwrapped wire frame.
-
24/04/2007 at 5:00 pm #36601Inactive
Finished
-
-
AuthorPosts
- The forum ‘Creative Content’ is closed to new topics and replies.